Step by step: from setup to your first sale
This is the easiest order for a shop that sells goods: set up your business details, then suppliers, then categories, then items, then bring in the stock, then sell. Each step takes a minute, and each has a detailed page if you want more.
A professional or service provider (electrician, driver, tailor)? You don't need suppliers or items: do steps 1 to 3, then go straight to quick sale by amount.
- 1. First setup
- 2. Business details
- 3. Currency
- 4. Suppliers
- 5. Categories
- 6. Items
- 7. Stock in
- 8. First sale
1. First setup
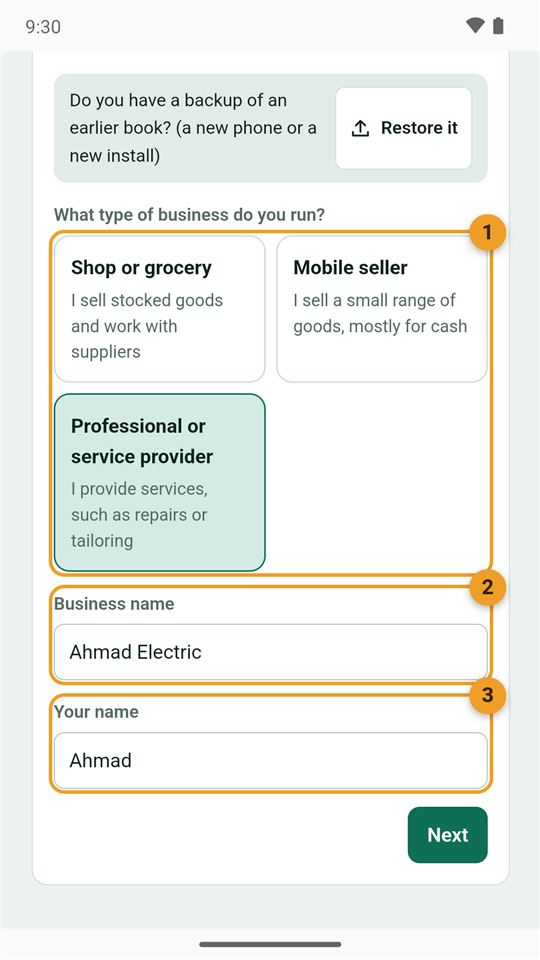
The first time you open the app, a short setup appears:
- Type of business: choose "Shop or grocery" if you sell goods from stock.
- The business name, printed on invoices.
- Your name (optional).
Then the currency and the "Simple" or "Full" mode. All of it can be changed later in Settings. Details in "Getting started".
2. Complete your business details
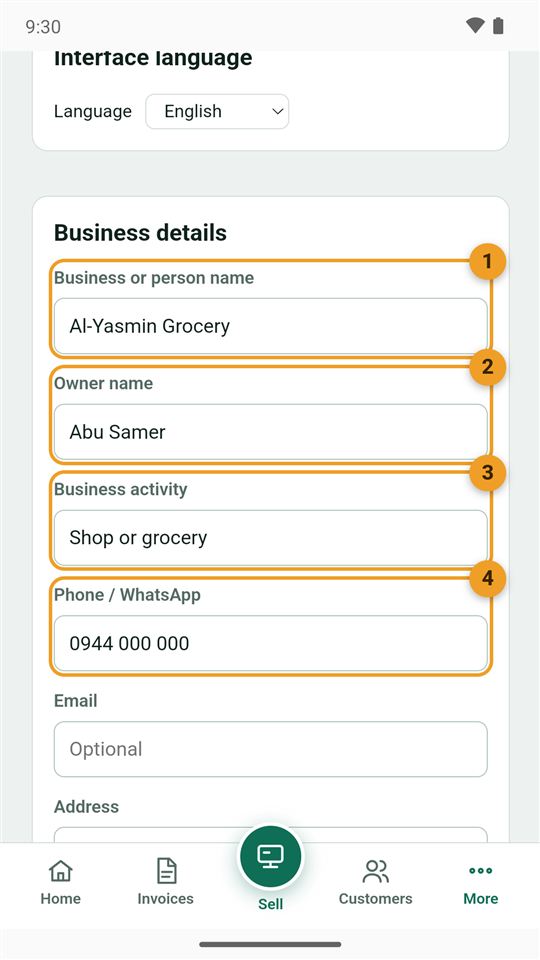
From More → Settings, the "Business details" card. What you write here appears at the top of every invoice:
- Business or person name.
- Owner name.
- Business activity, such as "Grocery" or "AC repair".
- Phone / WhatsApp, so customers can reach you from the invoice.
Below them are the address, e-mail and tax number, all optional. Then tap "Save settings" at the top of the page.
3. Check the currency
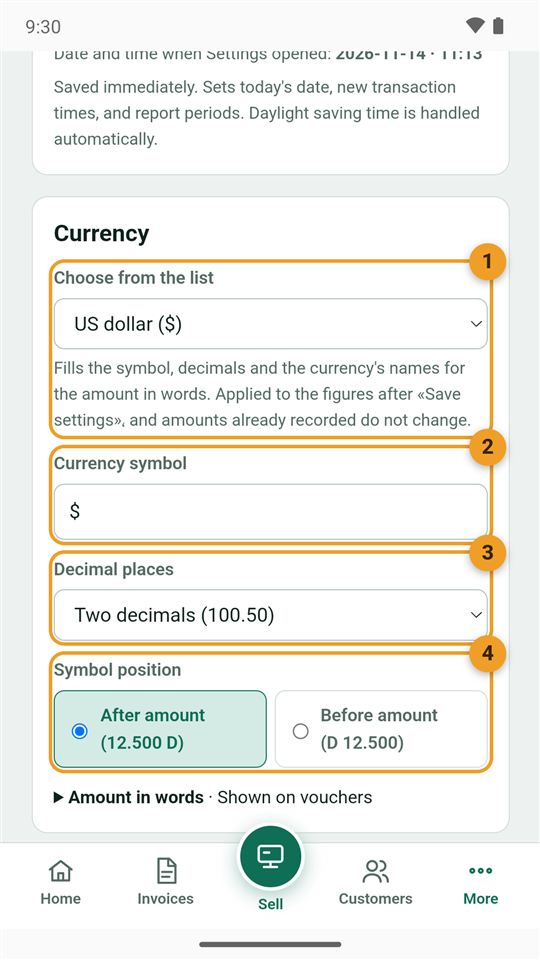
On the same page, the "Currency" card:
- Choose from the list: fills the symbol, decimals and currency names in one go.
- The currency symbol as you want it next to amounts.
- Decimal places: none (100) for a currency like the lira, or two (100.50) for the dollar.
- Symbol position: before or after the amount.
Then "Save settings". Change the currency at the start, before recording sales, because amounts already recorded are not converted.
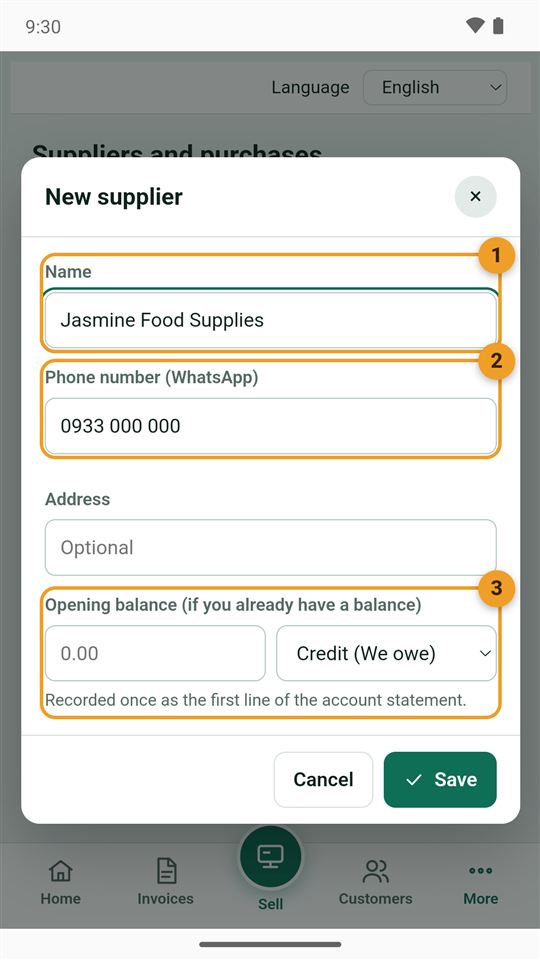
4. Add your suppliers
From the home page → the "New" section → "Supplier", for each wholesaler or distributor you buy from:
- The name.
- The phone number (WhatsApp), to send them the account statement.
- Opening balance: if you already owe them ("Credit"), or they owe you ("Debit").
After the first supplier, the "Suppliers and purchases" page appears under "More". Details in "Purchases and stock".
5. Create categories
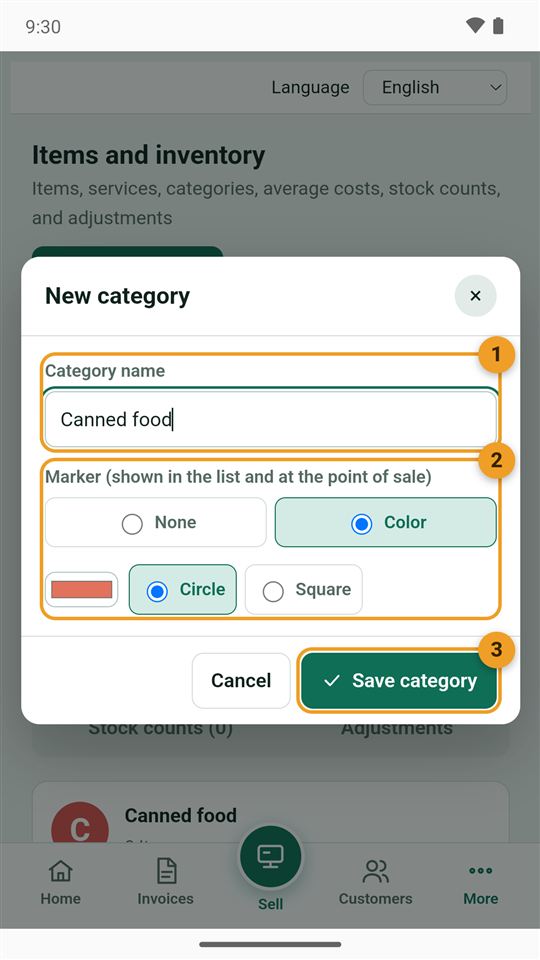
Categories group your items (drinks, canned food, cleaning…) and make searching on the sale screen faster. From More → Items and inventory → "Categories" tab → "New category":
- The category name.
- The marker: a colour and shape shown next to its items in the list and on the sale screen.
- Save category.
You can also create a category from the item window itself: choose "+ New category…" from the category list.
6. Add your items
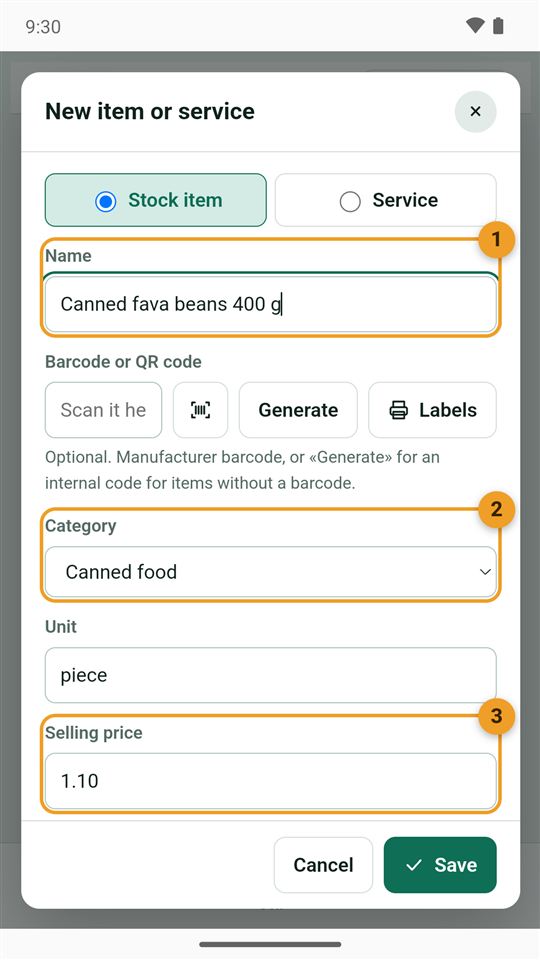
On the same page, the "Items and services" tab → "New item or service". Choose "Stock item" for what you sell by the piece, or "Service" for what is not stocked:
- The name as you want it on the invoice.
- The category you created.
- The selling price.
Below them are the barcode (scan it from the box or tap "Generate"), the cost, the quantity you have now, and a minimum so the app warns you before it runs out.
7. Bring in stock with a purchase invoice
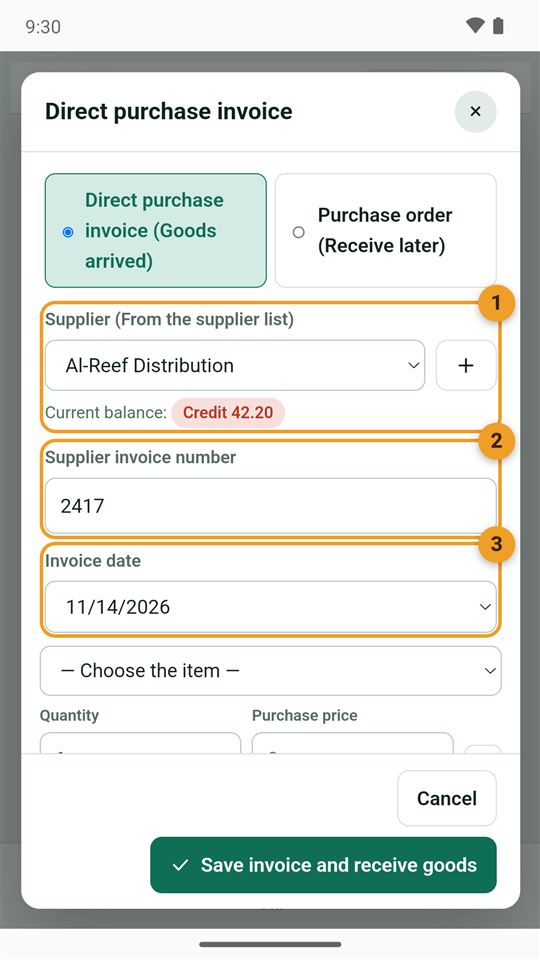
When goods arrive from a supplier, record them from the "Suppliers and purchases" page → "Purchase invoice". Quantities go up, and the cost and what you owe the supplier are worked out for you:
- The supplier.
- Their invoice number (optional).
- The date.
Then the items, their quantities and purchase prices, and what you paid now. The full invoice steps.
The first time only: for goods already in the shop, enter their quantity in the item window's "Quantity" box instead of a purchase invoice.
8. Your first sale
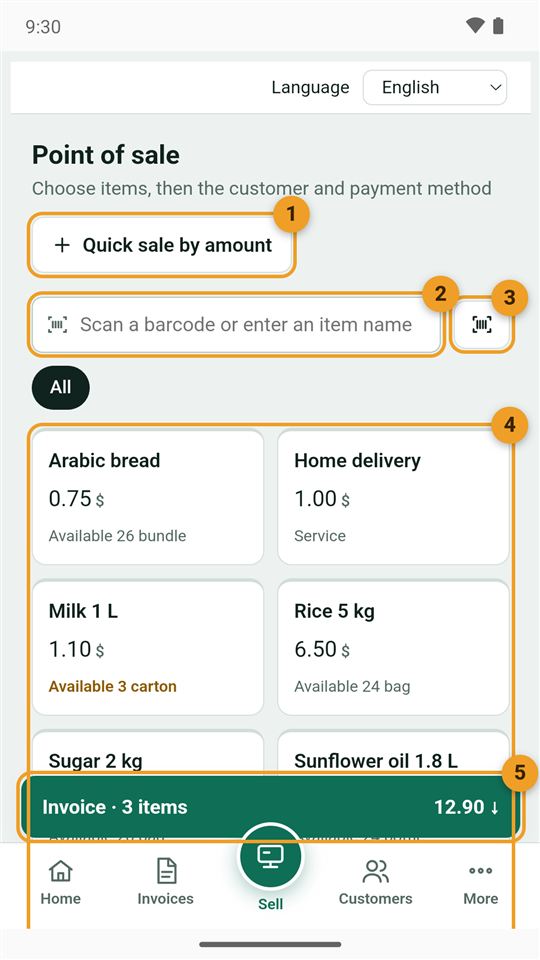
Tap the "Sell" button in the middle of the bottom bar:
- Quick sale by amount for a service without items.
- Search by item name or with a barcode reader.
- The camera to read barcodes.
- Items: tap an item once per piece.
- The invoice bar: tap it, then "All cash" and "Save".
Congratulations, that's your first invoice! All the ways to sell and get paid in "Selling".
After the first week: take a backup, and have a look at the reports.