Home › Guide › Getting started
Getting started
Your book is ready in a minute. No account, no e-mail, no password.
1. Install the app
On Android: get "DaftarSham" from Google Play.
The first 30 days are free, no card needed. The whole app works offline.
2. Choose your type of business and its name
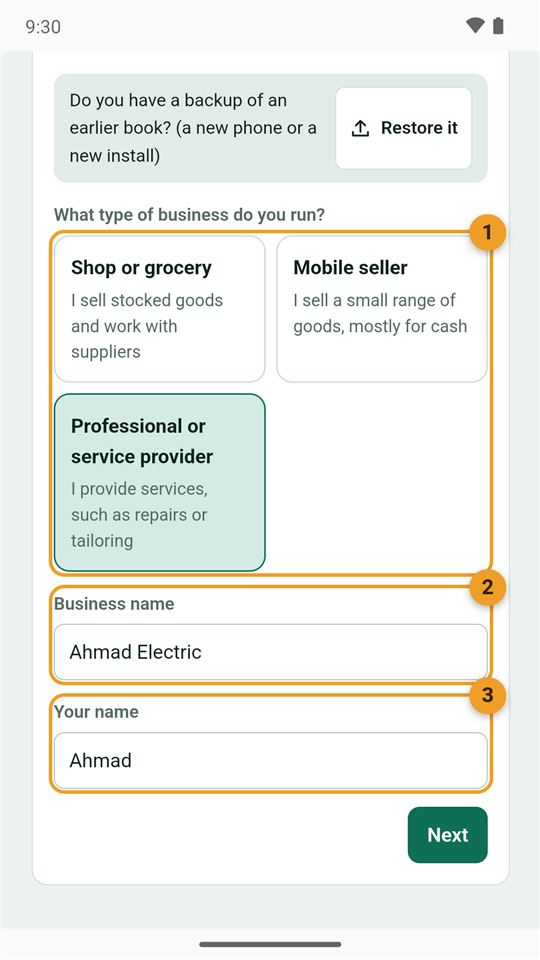
The first time you open the app, a short four-step setup appears:
- Type of business: "Shop or grocery" if you sell goods from stock, "Mobile seller", or "Professional or service provider" such as electricians, plumbers and tailors. The app picks the sections you see from it.
- Business name: printed on invoices.
- Your name: optional, for the greeting.
If you have a backup of an earlier book, tap "Restore it" at the top instead of setting up again.
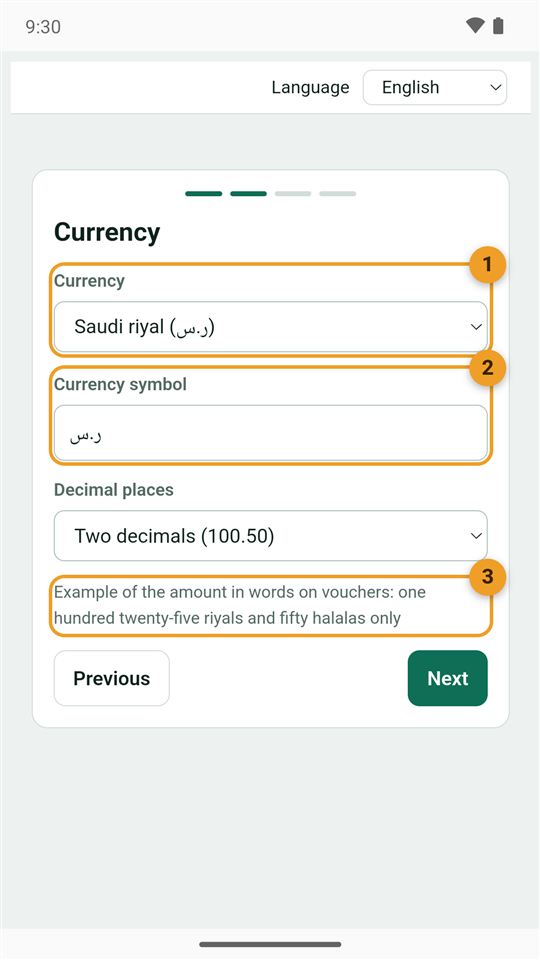
3. Currency
- Currency: the app suggests your country's currency; you can pick another one of more than 30.
- Currency symbol: as you want it next to amounts.
- Example: shows how amounts are written in words on vouchers.
Then enter the cash and bank money you have now (optional), and choose the "Simple" or "Full" mode; the app suggests the one that fits your business. All of this can be changed later in Settings.
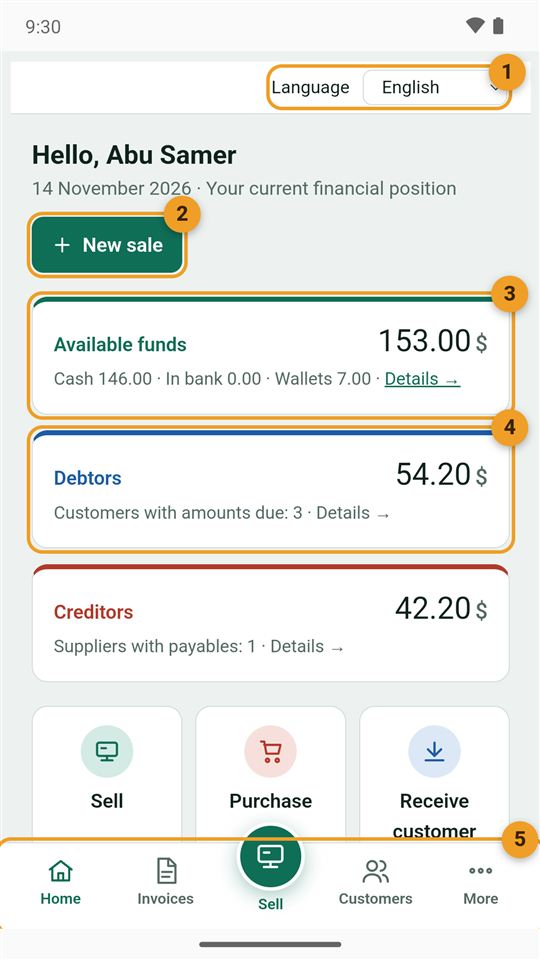
4. Get to know the home page
- Language: Arabic or English, at any time.
- New sale: the fastest way to the sale screen.
- Available funds: all the money you have now: cash box, wallets and bank.
- Debtors: what customers owe you. Tap "Details" to see who.
- Bottom bar: Home, Invoices, Sell, Customers, and More (expenses, reports, settings).
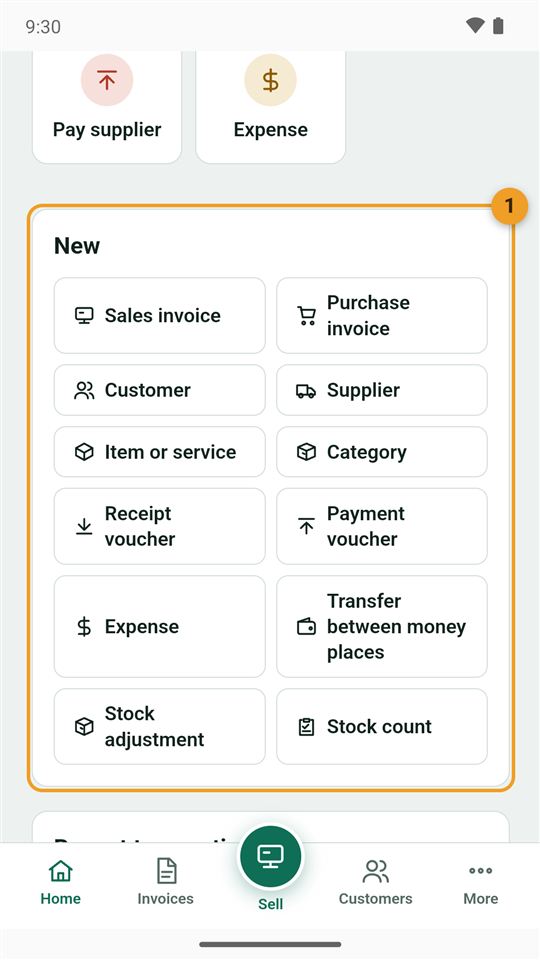
5. The "New" section: everything in one tap
Scroll down the home page to the "New" section. From it you open directly: a sales invoice, a purchase invoice, a customer, a supplier, an item or service, a receipt, a payment, an expense, a transfer between money places, and more.
Purchase and stock pages only appear once you start using them, so you are not bothered by what you don't need.